Your dashboard battery light just flickered on while you were driving, and now your headlights look dim. Most shops will immediately quote you for a full alternator replacement, but that is often an expensive overkill. You can frequently resolve charging issues by targeting specific internal parts or external connections instead of swapping the entire unit.
Fixing an alternator without replacing it involves replacing individual components like the voltage regulator, worn carbon brushes, or faulty bearings. You can also restore output by tightening a loose serpentine belt or cleaning corroded wiring connections. Most repairs focus on these specific parts to return the system to a healthy 13.8 to 14.7 volts.
How To Fix Your Alternator Without Replacing It? Initial Assessment

The alternator converts mechanical energy from the engine into electrical energy to charge your battery and power all vehicle electrical systems while the engine runs. A healthy alternator maintains system voltage between 13.8-14.7 volts, ensuring reliable starting and operation of all electronics.
Repairable Vs. Non-repairable Failures
Many alternator issues can be resolved by replacing specific components rather than the entire unit. The key is determining whether the problem lies with accessible replaceable parts or internal damage that makes repair impractical.
| Failure Type | Repairable | Difficulty | Cost Estimate |
|---|---|---|---|
| Worn brushes | Yes | Medium | $10-25 |
| Failed voltage regulator | Yes | Easy | $15-40 |
| Bearing noise | Yes | Medium | $20-50 |
| Stator failure | No | N/A | Replace unit |
| Rectifier diode failure | Sometimes | Hard | $30-60 |
Safety Precautions For Electrical Work
Working on alternators involves electrical systems that can deliver dangerous shocks or cause shorts that damage vehicle electronics. Always disconnect the battery before beginning any alternator repair work.
“Before attempting any alternator repair, verify the problem is actually with the alternator and not the battery, loose connections, or blown fuses. A simple voltage test can save hours of unnecessary work.”
For most DIYers, replacing brushes and the voltage regulator represents the practical limit of alternator repair. If the issue involves internal windings or complex electrical faults, professional repair or replacement is usually more cost-effective and reliable.
Spotting Alternator Failure Symptoms
Alternator failure often begins subtly but progressively worsens, affecting your vehicle’s electrical system before complete breakdown occurs. Recognizing these symptoms early allows for intervention before total failure leaves you stranded with a dead battery and no charging system.
For example, a customer recently brought in their Ford F-150 reporting intermittent power loss and dimming lights. Upon testing, we found the voltage output dropping below 12 volts at idle, confirming a failing voltage regulator rather than complete alternator failure.
Fixing Belts And Electrical Connections

A worn or loose serpentine belt can cause the alternator to malfunction or fail to charge the battery properly. Over time, the belt can crack, fray, or slip, leading to a decrease in performance. Regular belt inspections can help identify potential issues before they become major problems. When inspecting and adjusting the serpentine belt, make sure to consult your vehicle’s repair manual for specific instructions and guidelines.
Testing Voltage With A Multimeter
To test voltage with a multimeter, set the device to DC voltage mode and connect the black lead to a good ground and the red lead to the alternator’s voltage terminal. Ensure the multimeter is set to the correct range, typically 10-20 volts DC.
- Set the multimeter to DC voltage mode by selecting the appropriate range (usually 10-20 volts DC) and ensuring the function button is in the correct position. For most multimeters, this is the “DCV” or “VDC” position.
- Connect the black lead to a good ground on the vehicle, such as a bolt on the engine block or a metal bracket. Ensure the connection is secure and not loose.
- Connect the red lead to the alternator’s voltage terminal, which is usually labeled as “V+” or “Voltage”. Be careful not to touch any other electrical components or wires.
A good alternator should provide a voltage between 13.8 and 14.7 volts DC when the engine is running at a moderate speed. If the voltage is lower than 13.8 volts, it may indicate a problem with the alternator or the electrical system.
- Take a reading on the multimeter and record the voltage. If the voltage is within the normal range, the alternator is likely functioning properly.
- If the voltage is lower than 13.8 volts, check the alternator’s belt and electrical connections for any signs of wear or damage.
Replacing Brushes And Voltage Regulators

Replacing the brushes and voltage regulator assembly is a crucial repair to perform on an alternator to prevent complete failure. The brushes wear down over time, causing the alternator to produce a lower voltage, which can damage the electrical system of your vehicle. The voltage regulator assembly is responsible for regulating the output of the alternator, and if it fails, it can cause the alternator to produce a higher voltage, which can also damage the electrical system.
Corrosion raises resistance by creating a barrier between the brush and the slip ring, causing the alternator to produce a lower voltage.
In practice, corrosion can be prevented by keeping the alternator clean and dry, and by replacing the brushes every 50,000 to 100,000 miles.
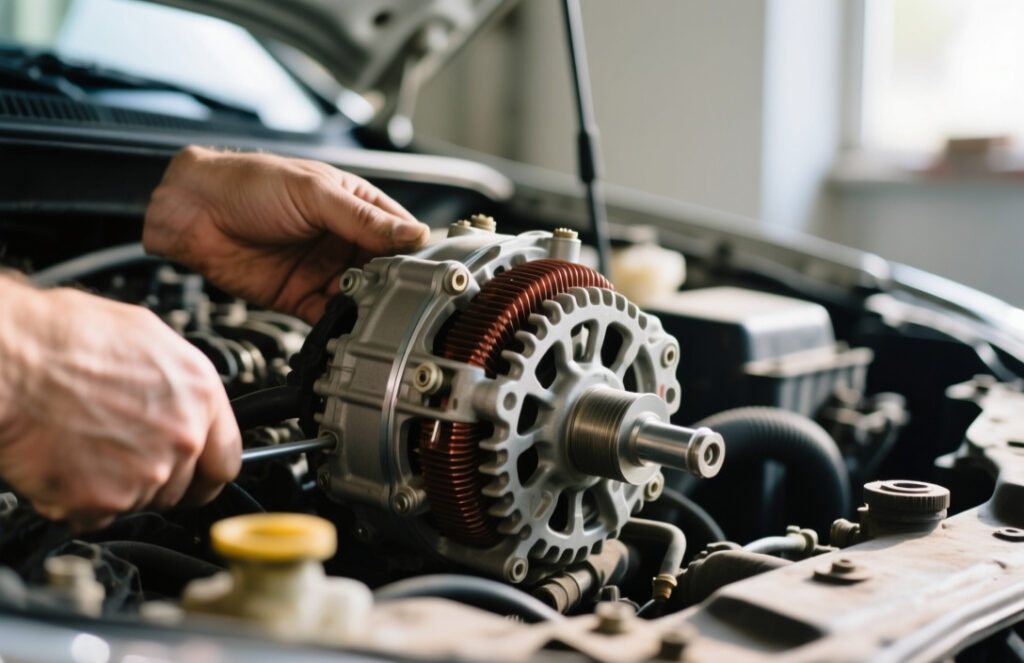
To replace the brushes, you will need to disassemble the alternator housing. Start by removing the serpentine belt and the bracket that holds it in place. Next, remove the bolts that hold the alternator housing in place and gently pull it away from the engine. Inside the alternator housing, you will find the brushes and the voltage regulator assembly.
It’s worth noting that replacing the brushes and voltage regulator assembly is a relatively complex repair that requires some mechanical aptitude. If you are not comfortable with this repair, it’s recommended that you seek the assistance of a professional mechanic.
The cost of replacing the brushes and voltage regulator assembly can vary depending on the type of vehicle and the quality of the replacement parts. On average, the cost can range from $50 to $200. The time required to complete this repair can also vary, but it typically takes around 2 to 4 hours to complete.
Repairing Noisy Alternator Bearings
Grinding or growling noises originating from the front of your engine often signal that the internal ball bearings of the alternator have failed. These components endure constant mechanical stress, and once their protective grease seal dries out or the metal races pit, the unit requires a teardown to restore smooth rotation.
Diagnostic And Removal Procedures
Front bearing failure usually creates a loud, rhythmic growl that changes pitch with engine RPM, while rear bearing issues often sound like a high-pitched whine or a chirping rattle. You can confirm the source by removing the serpentine belt and manually spinning the alternator pulley, feeling for any gritty resistance or side-to-side play in the shaft.
Pro Tip: Never use a standard hammer to drive bearings onto the shaft. The shock loads can indent the bearing races, causing the new part to fail within a few hundred miles. Always use a proper press or a specialized bearing driver tool.
Reassembling the unit requires patience to avoid pinching the internal wires or damaging the new seals. Ensure the brushes are retracted and held in place with a small pin or paperclip during housing closure to prevent them from snapping off against the slip rings. Once the casing is flush, check that the shaft spins freely by hand before reinstalling the pulley and testing the unit for noise under load.
Repair Costs Versus Full Replacement
Component repair costs significantly less in parts than a full unit. Replacing a voltage regulator or a set of brushes typically costs between $20 and $60. A complete replacement unit can range from $150 to over $500 depending on the vehicle.
| Part Type | Estimated Cost | Difficulty |
|---|---|---|
| Brush Kit | $15 – $30 | Moderate |
| Voltage Regulator | $30 – $70 | Moderate |
Quick Summary
Instead of replacing an entire alternator, you can often fix it by replacing specific internal components. Repairable parts include the voltage regulator, carbon brushes, diode trio, and pulley bearings, whereas damaged stator windings typically require a full unit replacement. A healthy system should maintain voltage between 13.8 and 14.7 volts. To ensure safety, always disconnect the negative battery terminal first and use insulated tools. These targeted repairs can restore electrical output and are generally more cost-effective for DIY enthusiasts than buying a new alternator.
Recognizing early failure symptoms is crucial for preventing total breakdown. Warning signs include the dashboard battery light, “ALT” or “GEN” indicators, and trouble codes like P0562 or P0563. You might notice dimming headlights, flickering interior lights, or sluggish power accessories. Auditory clues are also helpful; whining or whirring sounds often indicate bearing failure, while squealing suggests a worn serpentine belt. If the alternator fails to charge, the battery will drain over time, making it difficult to start the vehicle after it has sat overnight.
Frequently Asked Questions
How Can I Test If My Alternator Is Bad Without Replacing It?
You can test your alternator at home using a multimeter to check for proper voltage output. A healthy alternator should produce 13.8-14.7 volts when the engine is running, and most auto parts stores offer free testing services if you remove the alternator.
What Are Common Alternator Problems That Can Be Fixed Without Replacement?
Common fixable alternator issues include worn brushes that can be replaced for under $20, corroded or loose connections that can be cleaned, and voltage regulators that are sometimes replaceable separately.
How Much Does It Cost To Repair An Alternator Instead Of Replacing It?
Repairing an alternator typically costs $50-$150 depending on the specific issue, compared to $200-$600 for a new or remanufactured unit. You can save 75% of the replacement cost by just replacing brushes or the voltage regulator instead of the entire unit.
Can I Fix My Alternator Myself Without Professional Tools?
You can fix basic alternator issues like brush replacement with just a screwdriver, pliers, and a soldering iron, but more complex repairs may require specialized tools like a bearing puller. Most simple alternator repairs take 1-2 hours for someone with basic mechanical skills.
How Long Does An Alternator Repair Typically Take Without Replacement?
Basic alternator repairs like brush replacement typically take 1-2 hours from start to finish, while more complex fixes such as bearing replacement or rewinding may take 3-5 hours depending on your experience level.